IN THE BEGINNING
Tip - spread out the seeds
I noted the instructions on the seed package which says "Water regularly so that soil is damp but not wet; do not allow young seedlings to dry out."
Method: Using a pot with small drainage holes, I planted the seeds in damp soil. The soil used was the cheapo garden soil ($1.80 to $2 a pack). Water 2 times a day, morning and evening.
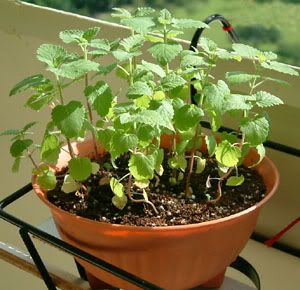
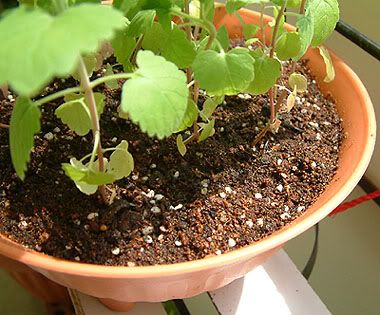
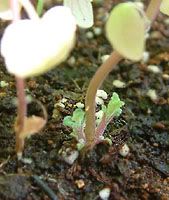
The first 2-3 weeks were the most trying, as it took 1-2 weeks for the seeds to sprout, and after that, they seemed to take even longer to show some semblance of growth. I must have planted over over 20 seeds in the pot, but finally, about half of them sprouted, including one alien plant shoot of unknown species (see the glossy leaf at bottom-left corner of the photo above).
On hindsight, I must remember to spread the seeds out a bit more. As can be seen from the photos in the earlier post, the plants are now packed a bit too close together.
2.5 WEEKS LATER
Tip - fertilize
While wondering why the plants were growing so slowly, I remembered that the package had also said "Apply Horti organic and Foliar fertiliser fortnightly." So off to the nursery I went, where I was told by the helpful staff that any organic fertiliser will do (not necessarily Horti brand), and that it was normal for seedlings to take a l-o-n-g time to grow. Hmmh.
Method: Her instructions were: "fertilize sparingly, and water (the plant)".
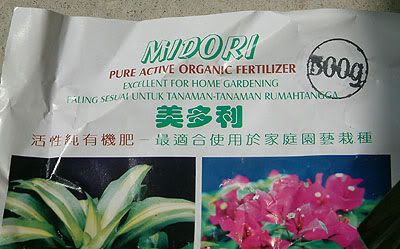
This was the fertilizer I bought.
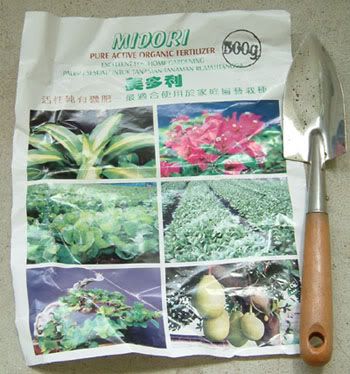 Organic fertilizer at $2 a pack - quite smelly & powdery; try not to apply under windy conditions
A closed-up of the text
At about this time, I noticed that the top soil looked dried out at times, even though I'd left the plant in a shaded part of the corridor and watered twice a day. To arrest this, I found some mossy/flossy soil in the storeroom and added a layer to the top soil. This soil (from Japan Home at $2.80) doesn't stick together like muddy soil and seemed to maintain moisture well.
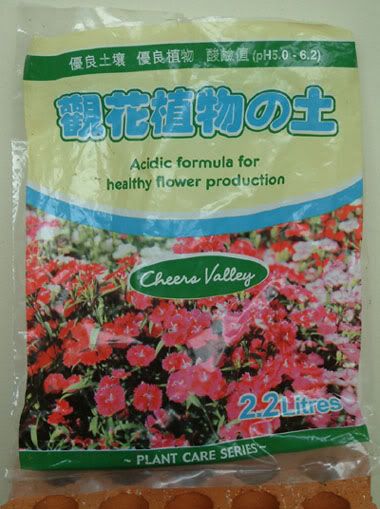 Packaging of the mossy/flossy soil
WEEK #4
Tip - protect young shoots from becoming salad
With the fertilizer and the top layer of mossy/flossy soil, the catnip was doing ok. However, I did notice a couple of shoots missing...yes, I counted the seedlings everyday. Haha!
From past experience, I suspected they must have become salad for a hungry lizard/insect/bird. Hence the pot of catnip needed high-level protection from predators, like this:
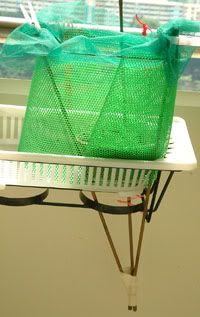 DIY plant security system - plant encased in re-used plastic wire mesh
WEEK #5
Tip - top up soil
The catnip seemed to be flourishing and grew taller. As the stems became stronger, the base and bits of roots were starting to expose themselves, so it became necessary to top up with more soil.
Method: I added more of the mossy/flossy soil as that was the only soil I had left; pat down the soil gently with fingers, and water.
I did a search on the net which said catnip thrives well in well-drained soil, so I guessed it was alright.
 Texture of mossy/flossy soil
Also, I found the armour of plastic wire mesh made it inconvenient for watering, so I replaced it with just a net, like this:
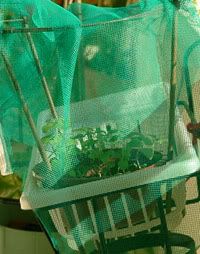 Plant covered with a light layer of netting - to protect young plants from harsh sunlight and predators
WEEKS #6 TO #9
Tip - continue with whatever that's working
The cycle went on like this:
- water twice a day (morning and evening)
- fertilize every 2 weeks *
- top up soil every 2 weeks *
* the fertilizing and soil top-up were done on alternate weeks
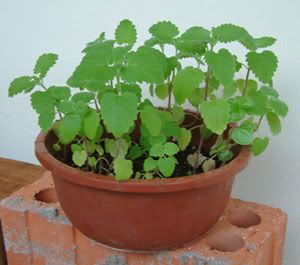 Catnip at 8 weeks old
At 9 weeks, I noticed that the early leaves (near the base) were turning yellow and falling off. Close inspection revealed that the roots seemed to be overgrown, so it was time to re-pot into a bigger container.
 New shoots sprouting from the base = more catnip?
WEEK #10
Tip - Er, observe, cross your fingers and stay hopeful?
The plant was re-potted and is no longer under cover, but is exposed fully to the elements - the sun, rain and strong winds which we get quite often.
I'm crossing my fingers and hope the catnip continues to thrive in its new pot.
Hope ksn finds this helpful. :)

8 comments:
fingers (humans') and paws (felines') crossed!
I'm going to have my human pet look these instructions over and see if she can't learn how to do this as well! :)
Thank you for that, auntie P. Instead of green thumb, I have black thumb, coz my pot plants all died on me. So hope these tips can help me to succeed this time!
Hi Aunty P,
I'm a writer with PETS Magazine and I'm currently doing a feature on Catnip. I found your blog to be really interesting and informative regarding growing your own catnip plants.
I was wondering if I could use your images and some of your advice for my article. You'll by credited, of course.
I hope you don't mind!
Looking forward to hearing from you :)
Charmaine
PETS Magazine
charmaine.ng@magsint.com
Hi Charmaine
Thanks for asking. You may use the material posted on this blog if you like.
Let me know if the article is published, so that I can get a copy.
Cheers!
Auntie P
Hi! Thanks for this post. Just wondering where did u get the seeds and fertilizer from? :)
I'm impressed by your dedication to protecting and nurturing these plants.
Post a Comment